Search This Blog

Friday, August 12, 2011

“Grandma, NO Singing!”


This is what my grandson says to me nearly every time I sing (he’s almost three now). Anyone who knows me, knows that I am absolutely smitten with my two young grandchildren. I was there to see them both arrive into the world, and have been incredibly lucky to help care for them on a regular basis. Of course I was singing to them from the day they were born. In fact, many of my website songs of the month for the last 2 1/2 years were inspired, concocted, and tested while on their watch (insert shameless plug for my FREE website songs here!). So it’s pretty funny that as soon as my grandson had words, he would say, “Grandma! NO singing!” I could have been crushed. I could try to analyze why he would say this. But I make my living singing… people pay me to sing! So I’m pretty sure my voice isn’t that annoying. I do have some theories, but they don’t really matter. What matters, is that I not stop singing to him.

When my grandson says, “Grandma, NO singing,” I pretend to be mortally wounded, as I feign crying (this has always been my response). It has become our private joke. He knows I love to sing, and that I will keep singing, and he’s safe in asking me not to…. because there’s no danger of that happening!

But over the years I have worked with so many adults who have also been told not to sing, and it has left them sad and not to be too dramatic, incomplete. We all need to sing, And as a practical matter, preschool teachers, daycare providers, and children's librarians must sing to do their jobs well.

In my workshop, “Help! I Can’t Sing, But I Want to!” (another shameless plug!) I work with parents, teachers, and childcare providers who believe they “can’t” sing. What I’ve consistently found is that:

1.Every person I have worked with can, indeed sing, and
2. Every person I’ve worked with can remember an exact moment when someone told them they couldn't, or shouldn’t sing. This might have been a child, husband or wife, or even a teacher. But for too many, the end result is the same.From that day forward, they don't sing. This breaks my heart. And it’s one of the many reasons so many adults don’t sing, or are extremely uncomfortable singing.

We are all born with a voice, and we are literally wired to sing. Children need to hear us singing, and they need to be encouraged to discover their own voices. Singing joins us together, teaches us empathy, helps support early literacy, and calms and comforts us- and so much more. It’s much too precious a gift to not use.

Years ago, after presenting at a major conference, I attended a workshop where a nationally known and respected presenter told the audience, “If you can’t sing in tune, don’t sing with children. They will learn out-of-tune singing.” I was mortified. You could just feel the attendees' voices being shut down. First of all, children have so many opportunities to hear in-tune and even well-trained voices, from recordings to concerts, to the many people in their lives. What children don’t have enough of is a live, caring voice. To sit in a lap and feel the vibration of a person’s voice singing to them. Music is our first language; it communicates through emotions. If an adult sings to a child from the heart, that child will be nurtured- regardless of the musical ability of the singer. And this very personal musical connection is what children need.

If you are an adult who has been told not to sing, or just don’t think you “can” sing, know you are not alone. Sadly, you are probably in the majority. But know that you need to sing, and the children in your life need to hear you sing. Period. End of story. We all learn to sing by singing

I'll be writing much more about singing and its benefits to not only young children, but ourselves. We humans are all in this together! In the meantime, Just Sing!

Did this touch a nerve with you? Share your story here!

Tuesday, August 9, 2011

Tuesday Tip! Apple and an Ant extras


Here's a great tip for one of my most popular songs for building early literacy. Apple and an Ant is one of my songs of the month, and you can download the mp3, and and print out pages with pictures, words, and letters to use with the song. But the real tip a link to my very good friend, Jim Thomas's wiki site. Jim has really used this song! He has posted pages for the entire alphabet, as well as entire versions in Spanish and for Australian audiences! This song works because it is simple, singable, and VERY repetitive- key for building early literacy. While you're at Jim's Wiki site, spend some time looking around. He has posted a huge amount of free information.

Link to Jim's Wiki site: http://toddlericon.pbworks.com/w/page/22320114/FrontPage
link to my website for the original Apple and an Ant song: http://www.nancymusic.com/Apple_antplay.htm

Tuesday, August 2, 2011

Tuesday Tip! Bounce a Bouncy Ball


Sometimes after my songs of the month are published, I find new ways to use them. This is the first of my Tuesday Tips to let you know about these additional ideas. As I add more, you'll be able to easily find them on this blog under "Songs of the Month Additional Ideas." If you have changed one of my songs or used it in a different way, please share it on my blog.

Bounce a Bouncy Ball
If you work with infants to two-year-olds, you can use my "Bounce a Bouncy Ball" song of the month as a finger play, instead of a movement song. Instead of following the written directions while using actual balls, do the following:
Whenever you say "Bounce a bouncy ball..," hold one hand flat in front of you, and form a ball with the other hand. Have the "ball" hand "bounce" up and down on open hand.
Verses 2, 3, 4, and 5, lend themselves to additional finger play motions. Babies love balls, and they love this song, so try it out! Copy and paste the link below to get to the song on my website.Its free to download, of course!
http://www.nancymusic.com/SOM/2010/bouncy-ball.htm

Tuesday, July 26, 2011

Delia and her homemade shaker


This is what I love most! Children leaving my concerts going home inspired! Little Delia awakened before the rest of the family, and made this wonderful shaker "out of a toilet paper tube and remnants of preschool art projects with jingle bells inside and lots of scotch tape." How cool is that?

This brings back memories of my own childhood,and explains a lot about how I turned out!

My first best childhood friend was Penny Weller. Penny’s mother (she had seven children!) cleverly provided a “crafts” drawer in the bottom of the built-in’s at the top of their winding brass-railinged staircase.. She filled it with scraps of anything that would otherwise have been thrown away; bits of yarn and string, old bottle caps, used greeting cards, as well as crayons, glue, tape, and scissors. We never knew what might have been added since our last visit! Penny and I would sit on the floor in the dimly-lit hall with the open drawer between us, hiding our work from each other. We would make little gifts and then exchange them. Memory plays tricks, of course, but in my mind we spent hours there, cutting and pasting and creating our works of art which were proudly given and received. I realize now so many lessons were learned at that drawer of “stuff!” Creating something from nothing, how to give and receive, and the comfort and complete happiness of having a good friend. I had plenty of creativity going on at my own house,- to be sure, but there was something magical about that hallway and drawer, and my first best friend.

In a couple of years, when my grandchildren are older- I don’t dream of having a stack of DVD’s or computer games for them to use when they visit, but of stocking a big bottom drawer with all the magical ingredients they need to build their own memories and life lessons. Just like Delia!

Please share your own stories of creativity and childhood! We adults need a little reminder of the simple things in life...

Tuesday Tip! Egg Shaker Update


So... for nearly 30 years, I have been making shakers from plastic Easter eggs. They are inexpensive, brightly colored, washable, and easy for little hands to hold. Great for a variety of songs and activities. For almost as many years I have sealed them using hot glue, and the bond has been stronger than the egg! But over the last five years or so, I noticed they eggs have been coming apart- as if they weren't even glued! I also noticed the plastic is thinner (so bends when you squeeze it), and has an "oilier" surface. Hmmm. This has been a problem, as I use my shakers a lot and even at large concerts. So... after much experimentation and research, here is what I have found...

I finally took a plastic egg to Tap Plastics, as they specialize in fabricating all kinds of plastic things. They actually did a test on the egg, and determined that it is made from one of only a few un-glue-able surfaces! It can't be glued! How unthinkable is that?

So, I have have only two solutions for you and me. Easiest is to use tape. You have several choices. I don't use scotch tape, because it's the tackiest looking and gets brittle and grungy quickly. A better choice is "repair" tape, a heavier pliable plastic tape available at office supply stores. I noticed in researching for this post, that Staples now carries a line of VERY fun designer duct tape! It comes in zebra print, and a variety of tie die colors. So you could use zebra print for all of the eggs, or get a roll of each tie die color to match the plastic eggs. Since duct tape is so wide, you'll want to cut strips into one-inch pieces before sealing the eggs. You can place strips of duct tape on wax paper to back them, allowing you to easily cut strips without getting yourself into a big old sticky mess! Then just peel off each one-inch strip and apply it to the egg.

The other way to seal the eggs (which my wonderful artist friend Frank Sunseri came up with) is with a soldering iron. Be sure to do this in a well-ventilated space! Gently press the tip of the soldering iron just below the seam of the egg where it will melt together both halves (you'll end up with a tiny indentation). Do this at about 1-inch intervals around the egg. It also tends to firm up that middle of the egg making it harder for children to "pop" it open.

You many wonder at this point why you shouln't just purchased egg shakers from music stores and forget trying to make them. I personally have three reasons to keep making my own.

1. Homemade are way cheaper, and since I do so many concerts and always lose a few, it just makes more sense.

2. Easter egg colors are much brighter and more fun than the rather dull primary-colored purchased ones.

3.I had a purchased one open once, and saw it was filled with an unidentified substance that looked like some kind of hard plastic bead. When I make my own shakers, I know what's in them- rice. I don't want to risk having unidentified objects being ingested by little mouths.

So now that you have a bit more information, you can decide whether or not you want to make your own shaker eggs. Whichever way you go, plastic egg shakers are a must if you make music with young children! Visit my website for songs and activities to use.
www.nancymusic.com.

Tuesday, July 19, 2011

Tuesday Tip! Swimming Noodle Sand Blocks


Best Sand Blocks Ever!

These "sand blocks" are made from inexpensive "swimming noodles," which are available just about everywhere now for a couple of dollars. They are brightly-colored 6 ft long pieces of foam used for flotation. In my town they are even available at the supermarket and drug store! If you can't find these (because it's not summer where you are, or they just aren't available where you live), you can use the gray foam pipe insulation tubes available at hardware stores. Not as colorful, but fully functional and still inexpensive.

To cut the noodles, you can use anything from a saw to a utility knife. The best tool is an electric knife. It makes a clean cut and you can make 30 pairs of blocks in just a few minutes! Be aware that if you use a saw, you will have rough pill-y edges which will shed for a while as the children are playing them. So if you have a choice between a saw and a utility knife, a utility knife makes a cleaner cut. Just be very careful, and you might want to mark a circle around the noodle before cutting, since the knife won't go all the way through.

So, once you have selected your cutting tool...

Cut the noodles in about 4" pieces, then cut each piece in half lengthwise. When children rub them together they make a wonderful sand block sound. And when they "clap" them, as children will inevitably do, they will make a very nice (quiet!) muffled clap, unlike wooden sand blocks that are very hard on the ears! Also, they won't cause injury when thrown ( another inevitable occurrence when working with young children!). They are washable, inexpensive, colorful, and musical! What more could you want?! I use them with train songs and any song that has wheels, as you can rub them around in circles. When playing train songs, you can make a train and walk around the room while playing.

Another great activity, is to play a pattern with your blocks, and have the children copy it. Older children can take turns being the leader.Or sing nursery rhymes and keep a rhythm on the blocks. All of these activities are great for building early literacy skills!

See my website for more songs and ideas for using homemade instruments. www.Nancymusic.com

Have fun!

Tuesday, July 12, 2011

Tuesday Tip! Water Bottle Rain Stick instrument


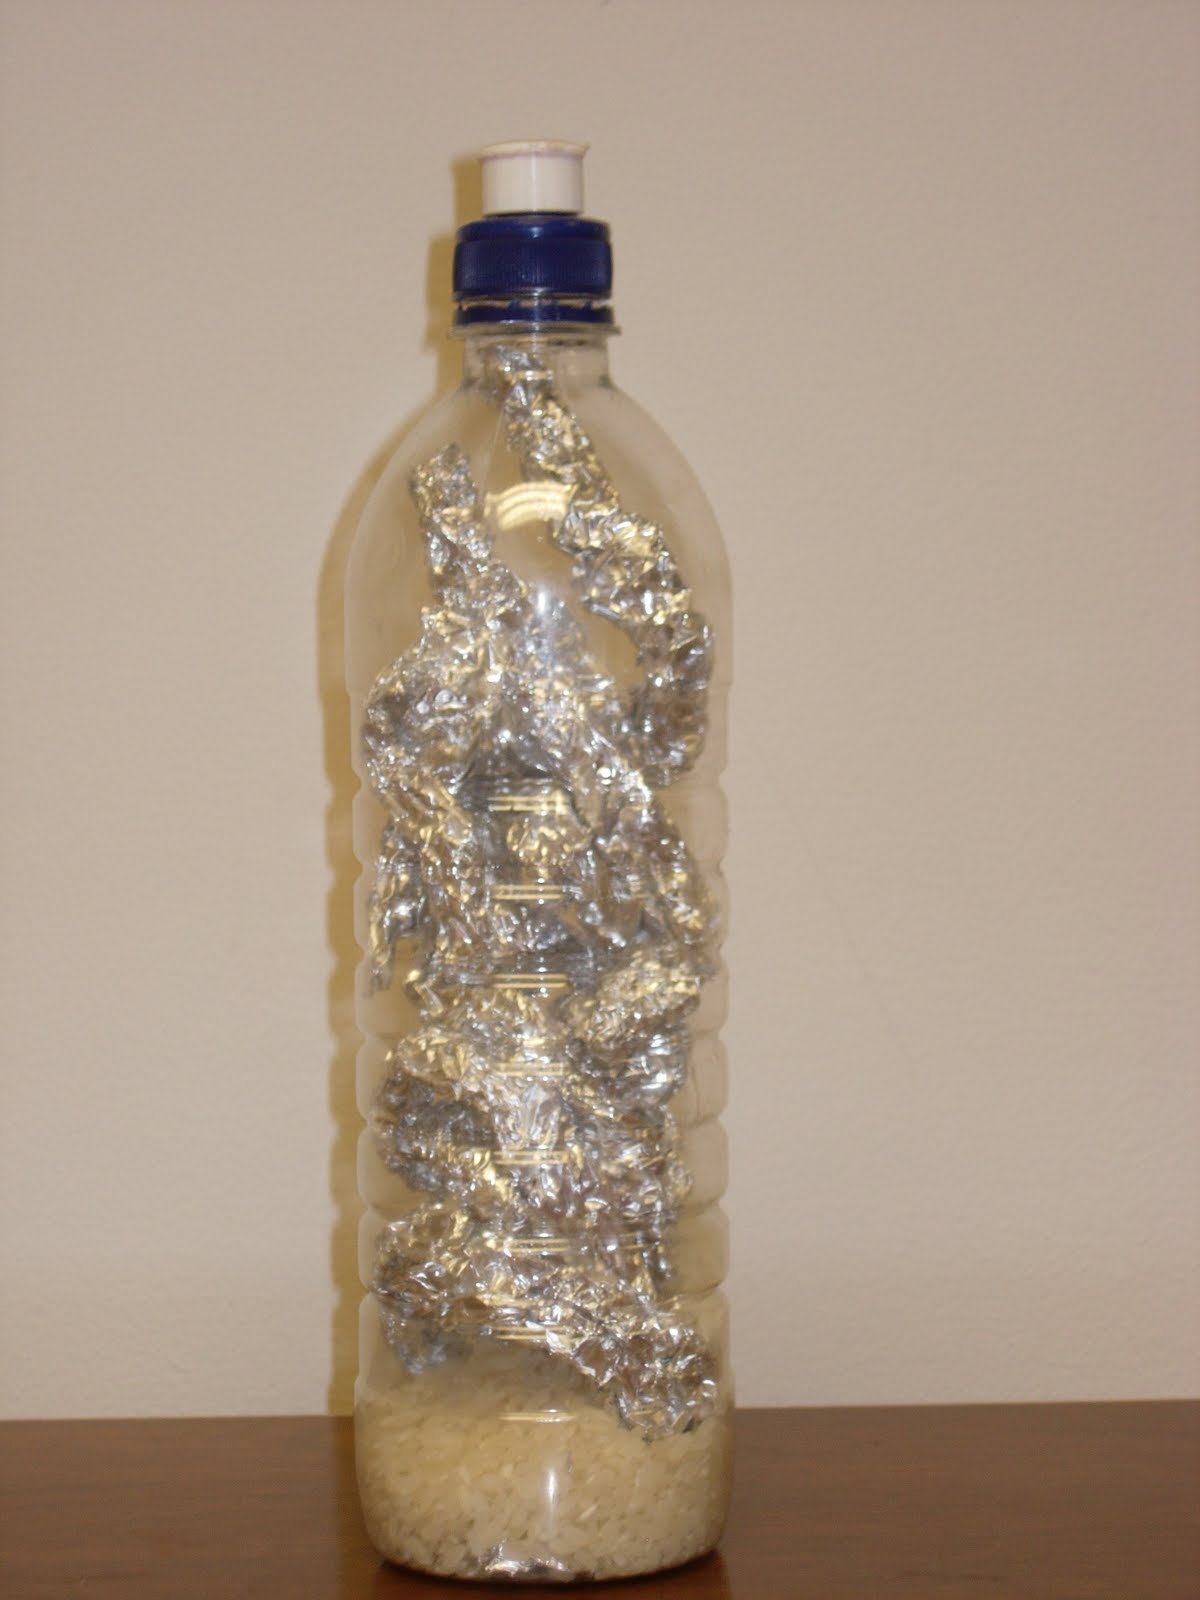
Starting today, I'll have a new tip every Tuesday. It will often be new ideas for past Songs of the Month, or homemade instruments. Today I'm posting an idea for a homemade rain stick. I used an empty plastic water bottle, aluminum foil, and rice.
Cut several strips of aluminum foil and loosely crumple them into ropes small enough to fit into the neck of the water bottle. kind of twirl them as you insert, so they wind around as they go in. The more "ropes" you put in the bottle, the more surfaces the rice will hit as it goes down. Add a couple of inches of rice, and replace cap on the bottle. Slowly tip the bottle, and you will hear the sound of rain as the rice makes it's way over the foil down to the bottom. If you leave the bottle un-decorated, as I have, children can see what's making the sound. Of course you (or better yet, the children), can decorate the bottle with anything from paper, colored tissue paper, ribbon, tape, string, stickers, or anything else you can find.I have left mine un-decorated so kids can see what's making the rain sound.
You can also use a stick or pencil and run it across the ribs of the water bottle and you have a guiro (Latin percussion instrument).